Saturday, December 30, 2023

Chicken and Fluffy Dumplings


 During the winter, I love to make one pot meals like soup. Nothing beats a hot and hearty meal that is very filling. This is my easy chicken and fluffy dumplings recipe.

------------------------------------------------------------------------------------------------------------------------
 
Prep Time: 5 minutes
Cook Time: 30 minutes
Serves: 4

Items Needed:
  • Large pot
  • Medium bowl
  • Cutting board
Ingredients:
  • 1.5lbs chicken breasts (or shredded rotisserie chicken)
  • 2 stalks celery, diced
  • 12-16oz frozen peas & carrots
  • 1/2 medium onion, diced
  • 1 tablespoon Italian seasoning
  • 1 teaspoon mustard powder
  • 1 tablespoon garlic, minced
  • 1 tablespoon dried parsley
  • 32oz low sodium chicken broth
  • 1/2 cup half and half (or milk)
  • 3 tablespoons unsalted butter
  • 5 tablespoons all-purpose flour
  • 1 cup Bisquick
  • 2/3 cup milk
  • Black pepper to taste
Directions:
  1. If you have not cooked your chicken, I recommend cooking it in the pot with butter, Italian seasoning, and black pepper. Then cut it in pieces or shred it. Remove it from the pot.
  2. Add the butter, celery, onions, and garlic. Cook until softened.
  3. Add the flour and mix thoroughly.
  4. Add the half and half slowly and whisk.
  5. Add the chicken broth and stir well.
  6. Add the peas and carrots, chicken, and seasonings including black pepper. Simmer for 10 minutes.
  7. While the soup continues to cook, mix together the Bisquick and 2/3 cup of milk to form a soft dough. Do not over mix. (I prefer using my hands)
  8. Take pieces of the dough and drop them into the soup. I kept them to about 2 inches. Do not mix them, just drop them in.
  9. Once all the dumplings have been added to the soup, cover the pot with a lid and steam them for 10 minutes. 
    • Do not cook them longer than 15 minutes as they may become less fluffy and more dense due to being overcooked. It is very important not to lift the lid so that the dumplings steam properly. Make sure the soup is still simmering while they cook.
  10. Serve hot in a bowl with 2-4 dumplings (depending on size).

You can add seasonings to the Bisquick dough. I would suggest just a little dried parsley, garlic powder, Italian seasoning, and black pepper. If you enjoy a thicker soup, add more flour or try heavy cream instead of half and half. If you prefer it thin and soupy, use less flour. If you like a lot of dumplings, I suggest doubling the Bisquick and milk mixture.

Friday, April 29, 2022

Dill Ranch Chicken Salad

 Chicken salad can be one of the most refreshing meals during the summer. I love chicken salad but my husband who dislikes mayonnaise won't eat traditionally chicken salad. Therefore, I came up with a simple ranch based recipe.

------------------------------------------------------------------------------------------------------------------------
 
Prep Time: 25 minutes
Cook Time: 15 minutes
Serves: 4

Items Needed:
  • Large pot
  • Large bowl
  • Cutting board
Ingredients:
  • 1-1 1/4 lbs chicken breasts
  • 2 stalks celery, diced
  • 5-6 sprigs of fresh dill
  • 2 teaspoons of ranch seasoning
  • 13oz bottle of Litehouse Homestyle Ranch
  • Ground or cracked black pepper
Directions:
  1. Add water to the large pot, chicken, 2 sprigs of fresh dill, 1 teaspoon of ranch seasonings, and sprinkle of pepper. Boil on medium-high until chicken is cooked through (10-15 minutes)
  2. While the chicken is cooking, chop of the celery into small diced bits. Chop up 3-4 sprigs of fresh dill until you have 2 tablespoons worth. Add the celery and dill to the large bowl.
  3. When the chicken is cooked through, shred it and add it to the large bowl.
  4. Add about 1 teaspoon of ranch seasoning. Do NOT add any additional salt to the mixture. Add almost the entire bottle of Litehouse Homestyle Ranch. Mix in a little at a time to make sure you like the ratio. Add pepper to taste.
  5. Refrigerate for at least 1 hour before serving as the chicken will still be warm. Serve by itself, on bread, crackers, or lettuce.

Please use fresh dill NOT dried dill for this recipe. It makes the taste very different with that freshness. You can also add onions or chives to the chicken as it cooks.
Any type of ranch can be used but I highly recommend Litehouse products for their low carbs and low sugars. Litehouse tastes homemade and I will not touch any other brand of ranch dressing anymore. The consistency is less thick than other brands, which makes it ideal for this recipe.
Feel free to add other favorites such a diced small onion, green onions, or grapes to your mixture. We do not like them, so we do not add them but you can!

Saturday, December 11, 2021

Best Beef Stroganoff

 Good beef stroganoff can be hard to come by. There are two secrets to making the best beef stroganoff. The first is to ensure that a quality tender meat is being used. I prefer top sirloin, but filet mignon is another option. Some people also choose to use ground beef. The second secret is to temper the sour cream to make sure it doesn't curdle in the sauce.


------------------------------------------------------------------------------------------------------------------------
 
Prep Time: 20 minutes
Cook Time: 8 hours
Serves: 4

Items Needed:
  • Large pot
  • Large frying pan
  • Cutting board
Ingredients:
  • 1lb top sirloin, thinly sliced into bite sized pieces
  • 2 tablespoons extra virgin olive oil
  • 4 tablespoons unsalted butter
  • 1 medium yellow onion, diced
  • 6oz mushrooms, sliced
  • 1 teaspoon garlic, minced
  • 14oz can low sodium beef broth
  • 1 cup heavy whipping cream
  • 1/2 cup sour cream
  • 2 tablespoons Worcestershire sauce
  • 1 tablespoon Dijon mustard
  • 1 tablespoon fresh parsley, chopped
  • 2 tablespoons all-purpose flour
  • Salt & pepper
  • 16oz box of noodles such as egg noodles or cavatappi
Directions:
  1. Add water to the large pot and wait for it to boil. Add noodles once it starts to boil. Cook until al dente.
  2. In the pan, add the extra virgin olive oil and the top sirloin with salt and pepper. Cook for a few minutes on each side on medium-high heat to ensure the meat is cooked, but be careful not to overcook the meat.
  3. Remove the meat and set it aside, add only 2 tablespoons of butter to the pan and add the onions. Cook for a few minutes until softened then add the mushrooms. After another few minutes, cook the mushrooms until softened then add the garlic and cook until fragrant. Usually 1-2 minutes.
  4. Add the 2 tablespoons of flour and cook until the flour is cooked. Usually a 1-2 minutes.
  5. Add the beef broth and heavy whipping cream, ensuring you scrape along the edge and thoroughly stir. Simmer for a few minutes until it starts to thicken.
  6. Take the sour cream and add about 5 spoonfuls of the sauce slowly to the sour cream and stir it to temper it. Once the sour cream has been incorporated with some of the sauce, add it to the pan. Keep stirring to make sure it doesn't curdle and it evenly distributes in the sauce.
  7. Stir in the worcestershire sauce, dijon mustard, fresh parsley, salt, and pepper. Cook until the sauce is creamy with a slightly thick consistency.
  8. Add the cooked beef back into the pan with the sauce and cook for another minute and then turn off the heat.
  9. After the pasta has been drained, add the last 2 tablespoons of butter to the pasta.
  10. Add the pasta to a plate with the beef and sauce on top. Add a sprinkle of fresh parsley and pepper to finish it off.

Mississippi Pot Roast Meets Traditional

I absolutely love pot roast, especially on a busy day when I come home to dinner cooking in the crock pot all day. Recently, I tried "Mississippi Pot Roast" and it was almost the best I have ever had, but I did miss some of the traditional elements of other pot roasts. I cooked up a perfect blend between the two and I promise if you try it, you won't go back!


------------------------------------------------------------------------------------------------------------------------
 
Prep Time: 20 minutes
Cook Time: 8 hours
Serves: 4

Items Needed:
  • Crock pot
  • Large frying pan
  • Cutting board
Ingredients:
  • 3lbs+ chuck or rump roast
  • 2 tablespoons extra virgin olive oil
  • 2 ribs of celery, diced
  • 1 medium yellow onion, sliced
  • 1lb bag of baby carrots
  • 6-8 pepperoncini peppers, stems removed
  • 1 packet au jus gravy mix
  • 1 packet ranch seasoning
  • 1 packet pot roast seasoning
  • 14oz can low sodium beef broth
  • 2 sprigs of rosemary
  • 2 sprigs of thyme
  • Handful of fresh parsley, chopped OR 1 tablespoon of dried parsley
  • 1 tablespoon minced garlic
  • 1 teaspoon worschstershire sauce
  • 1 stick of butter (unsalted preferred)
  • Salt & pepper
  • *2-3 tablespoons of all-purpose flour (optional, for making gravy)
Directions:
  1. Sprinkle salt and pepper on both sides of the roast, put the extra virgin olive oil in the pan and sear the roast for a few minutes on each side on medium-high heat.
  2. Add all of the ingredients listed above into the crock pot, except the flour.
  3. Cook for 8 hours on low.
  4. After the roast has completed cooking, remove the sprigs of rosemary and thyme then shred the meat inside the crock pot with a couple of forks.
  5. Serve over mashed potatoes with garlic bread or rolls on the side.
  6. Optional: I remove the solids for the most part using a strainer or slotted spoon and then make a gravy with the broth and juices left in the crock pot by slowly adding the flour and stirring. Depending on the amount of broth left, more/less flour is needed. I tend to add a tablespoon at a time slowly stirring to incorporate and cook the flour to make a gravy to the consistency I like it. The crock pot is usually still set to low to help with cooking the gravy. Alternatively, you don't need gravy or can buy store bought. This gravy has a bit of kick to it from the peppers.
Change it up: You can add a packet of onion soup mix if you like an onion flavor, add the pepperoncini juice, 10oz bag of peas, 6oz diced mushrooms, or some gold/red potatoes!

Tuesday, April 27, 2021

Lasagna Soup!

 Traditional lasagna in a thick soup! This recipe is much quicker to make and just as tasty!

------------------------------------------------------------------------------------------------------------------------
 
Prep Time: 10 minutes
Cook Time: 25 minutes
Serves: 4

Items Needed:
  • Large pot
  • Medium bowl
  • Cutting board
  • Measuring tools
Ingredients:
  • 1lb Italian chicken sausage, removed from casings & diced
  • 15oz can tomato sauce
  • 15oz can crushed tomatoes
  • 1lb lasagna noodles - oven ready
  • 4oz mozzarella cheese, diced 
  • 15oz ricotta cheese
  • 4oz shaved or shredded Parmesan cheese 
  • 4oz spinach
  • 32oz low sodium or fat free chicken broth
  • 1 bunch of fresh basil, shredded 
  • 1 tablespoon minced garlic
  • 1 teaspoon extra virgin olive oil
  • 1 teaspoon Italian seasoning, set extra aside
  • 1/4 teaspoon onion powder
  • Salt & pepper to taste
Directions:
  1. In the large pot, add the olive oil, chicken sausage, and garlic on medium high. Cook until sausage is cooked and browned
  2. Add the tomato sauce, crushed tomatoes, and seasonings. Include salt and pepper to taste. Stir and add the chicken broth. Stir again.
  3. Break up the lasagna noodles to bite sized pieces and add to the pot.
  4. Cook for about 5 minutes and add the spinach and basil.
  5. Cook for another 5 minutes and add the mozzarella and half the Parmesan cheese.
  6. In the medium bowl, add the ricotta and some Parmesan cheese. You can add them Italian seasonings, basil, salt, and pepper too. (optional)
  7. When the noodles are done cooking, turn off the heat and add half the ricotta mixture and stir well.
  8. Serve in a bowl with more ricotta mixture and Parmesan cheese on top.
Note: You can do any type of sausage, but we love Italian chicken sausage. Some people prefer cottage cheese over ricotta. I haven't tried it, because I don't like cottage cheese in lasagna, so I can't say whether it's a good substitute or not. You can also use store-bought sauce, but we don't use that.

Sunday, March 28, 2021

Cucumber Tomato Ranch Salad

 This salad is the most easiest and simple recipe I know, while still being tasty. It's citrusy, light, and fresh with just the perfect amount of seasoning.

------------------------------------------------------------------------------------------------------------------------
 
Prep Time: 10 minutes
Serves: 4

Items Needed:
  • Large bowl / Salad bowl
  • Measuring tools
Ingredients:
  • 1 large cucumber, cut into quarters
  • 1 pint grape tomatoes, cut into quarters
  • Juice from 1 lemon
  • 1 tablespoon of extra virgin olive oil
  • 1 ranch seasoning packet / salad dressing mix packet (we used hidden valley)
Directions:
  1. Add all of the ingredients into a bowl and mix gently until thoroughly combined. There should not be any visible 'powder' from the seasoning packet.

Note: You can add a little red onion, shallot, or green onions to this dish or any type of salad dressing.

Saturday, February 20, 2021

Chicken Bacon Ranch Avocado Salad!

 A quick, tasty meal that's mostly healthy! It's a salad that most people will love!


------------------------------------------------------------------------------------------------------------------------
Prep Time: 15 minutes
Cook Time: 20 minutes
Serves: 4

Items Needed:
  • Large bowl / Salad bowl
  • Measuring utensils
  • Large frying pan OR grill
Ingredients:
  • 1.5lbs chicken breasts
  • 1 head of lettuce, chopped (we used iceberg)
  • 1/2 cup shredded cheese (we used cheddar)
  • 1 avocado, diced
  • 2 eggs, hard or soft-boiled, diced
  • 1-2 Roma tomatoes, diced
  • 1 cucumber, diced
  • 1 package of bacon, cooked & diced (crispy bacon works best)
  • 1 bottle of ranch dressing
  • 1 tablespoon extra virgin olive oil (if you are pan frying)
  • salt & pepper
Directions:
  1. Cook the bacon first. Crispy bacon works best for this recipe. We cheated and bought pre-cooked bacon with 12 pieces and heated it up for an extra 30 seconds in addition to the suggested cooking time on the package to get it crispy. Let it cool to touch and dice.
  2. Cooking chicken pan fry method: Cut the chicken into tenders and smaller sections to cook evenly and faster in a pan. Cutting the breasts lengthwise may be helpful. Season both sides with salt and pepper to taste. In the large frying pan, add the olive oil and put it on a medium-high heat. Add the chicken. Cook on both sides for about 10 minutes each. They should be a light to dark brown color as pictured to get a good 'crisp' on the outside. Alternatively, you can grill your chicken. Once done, cut into bite sized pieces.
  3. While the meat is cooking, chop up the rest of the ingredients and add them to the large bowl.
  4. Add the bacon, chicken, and cheese to the bowl and mix it together.
  5. Serve salad into individual bowls and add ranch dressing as desired. Don't add it to the large bowl because the lettuce will get soggy.

Note: You can use whatever type of cheese, lettuce, bacon, tomatoes, and ranch dressing as you would like to! We went with what was cheap and convenient for us.

We really love Litehouse brand dressings. It's pictured above if you're curious. They have the best flavors with nearly NO sugar or carbs, which is perfect for diabetics. We used the Homestyle Ranch, but their Buttermilk Ranch is great too! I would also highly recommend their Bleu Cheese dressing too for this salad.


Saturday, December 12, 2020

Friggin' Chicken - Extra Crispy Fried Chicken

 This is the best crispy fried chicken ever. We say it's way better than KFC! It's important to follow the recipe's measurements and directions for the technique to get that crisp outside and tender inside with breading that stays on the chicken.

------------------------------------------------------------------------------------------------------------------------
Prep Time: 30 minutes
Cook Time: 30 minutes
Serves: 4

Items Needed:
  • Large pot
  • Measuring utensils
  • 2 medium bowls 
  • Tongs (helpful for frying)
Ingredients:
  • 2 cups buttermilk
  • 1 egg
  • 1 tablespoon hot sauce (we used Tabasco)
  • 1 1/2 - 2 lbs thin sliced chicken, trimmed of fat (can buy thin sliced or do it yourself)
  • 2 cups all-purpose flour
  • canola oil (enough to fill half the pot)
  • 1/4 cup cornstarch
  • 2 teaspoons baking powder
  • 1 teaspoon baking soda
  • 2 teaspoons salt
  • 2 teaspoons black pepper
  • 2 teaspoons dried parsley
  • 2 teaspoons ranch seasoning
  • 1 teaspoon cayenne red pepper
  • 1 teaspoon garlic powder
  • 1 teaspoon onion powder
  • 1 teaspoon buffalo or red hot seasoning
Directions:
  1. In a large pot, fill it half way (do not fill it more than half way as it becomes a safety hazard) with canola oil and set it on medium to medium-high heat for about 10 minutes until hot. It is ready when you dip a wooden spoon in, and bubbles form around the spoon. If the bubbles are very fast, turn your heat down. If the bubbles are very slow, turn your heat up. You can also sprinkle some of the flour mixture and if it fizzles and fries, it's ready.
  2. In one bowl, add the buttermilk, hot sauce, and egg. Whisk.
  3. In the second bowl, add all the other ingredients (besides oil & chicken) and whisky thoroughly.
  4. Take the chicken one by one and dip in the flour mixture and make sure to press the flour into it every where. Shake off excess. Then put it in the buttermilk mixture and coat it thoroughly on each side. Shake off excess. Put it back in the flour mixture ensuring it's evenly coated again and pressed in all over the chicken. Shake off excess.
  5. Fry in the large pot for 3-5 minutes on each side until golden brown. Place on a paper towel to soak up extra oil or place it on a metal drying rack.

Note: For a Nashville Hot Chicken take, you can put 1/4 cup or more of hot sauce directly into the oil. The more, the hotter.

Friday, November 13, 2020

Chicken Noodle Soup!

 One of the best foods to eat during Fall and flu season is this easy chicken noodle soup recipe!


------------------------------------------------------------------------------------------------------------------------
Prep Time: 30 minutes
Cook Time: 30 minutes
Serves: 4

Items Needed:
  • Large pot
  • Measuring utensils
Ingredients:
  • 64oz chicken broth
  • 3 large carrots, peeled & diced
  • 3 celery ribs, diced
  • lb chicken breasts, trimmed
  • 2 bay leaves
  • 1 teaspoon parsley
  • 1/2 teaspoon oregano
  • 1/2 teaspoon thyme
  • 1/2 teaspoon poultry seasoning
  • 1/2 teaspoon garlic powder
  • 1/2 teaspoon onion powder
  • 1/2 teaspoon salt
  • 1/2 teaspoon black pepper
  • 16oz egg noodles or any other choice of noodles (used elbow for this)
  • 3 dashes of red cayenne pepper (optional)
Directions:
  1. In a large pot, add the broth, carrots, celery, chicken, bay leaves, & all the seasonings. Bring to a bowl on medium high heat.
  2. Let the chicken cook for 10 minutes or until tender. Remove bay leaves & discard. Remove the chicken and shred it. Add it back to the pot.
  3. Add the noddles and continue cooking until they are tender. Cook time varies based on the noodles you use. Salt & pepper to taste. Serve.
  4. Some people like more broth or watery soups, so you can add 1-2+ cups of water, if desired.
  5. Optional: You can add a sliced whole white onion to the soup and omit onion powder if you enjoy onions in your chicken noodles!

Sunday, October 4, 2020

Broccoli Cheddar Soup!


 One of the best soups is Broccoli Cheddar Soup! This is a quick recipe perfect for those Autumn days and it's a one pot meal.

------------------------------------------------------------------------------------------------------------------------
Prep Time: 30 minutes
Cook Time: 20-40 minutes
Serves: 6

Items Needed:
  • Large pot
  • Measuring utensils
Ingredients:
  • 2 12oz bags frozen broccoli (fresh is fine)
  • 2 large carrots, peeled & diced
  • 2 medium yellow onions, diced
  • Optional (one, two or all three): 
    • 4 ribs celery, diced
    • 5 russet potatoes, diced
    • 4 green onions, whites only, diced
  • 4 tablespoons butter
  • 4 tablespoons all-purpose flour
  • 2 cups heavy cream
  • 32oz vegetable broth
  • 1/2 cup sour cream
  • 1lb Velveeta cheese, diced
  • 1 cup shredded cheddar cheese
  • 1 teaspoon garlic, minced
  • 1/2 teaspoon paprika
  • 1/2 teaspoon dry mustard
  • 1/2 teaspoon dill
  • 1/2 teaspoon salt
  • 1/2 teaspoon pepper
  •  Optional Toppings:
    • Green onions
    • Cheddar cheese
    • Oyster crackers
Directions:
  1. If you are adding potatoes, boil them in a very large pot for about 20 minutes with some salt until the potatoes are tender and a fork slides through them easily. Drain potatoes and set aside. Use the same pot. If not using potatoes, skip this step.
  2. In a large pot, add the butter, garlic, carrots & onions. Add the celery & white onions if you are using them. Let them cook for about 7 minutes on medium high heat until they get soft. Steam your broccoli as you normally would. Drain and set aside the broccoli. I drained them in the same colander as the potatoes and kept them together sitting aside.
  3. Add the flour and cook on medium low heat mixing in the flour to make sure it's being cooked to form a thick roux. Once the roux is formed, add the heavy cream a little at a time mixing it in to keep the roux on the thick side.
  4. Add the vegetable broth and turn it up to medium high heat. Stir in all the seasonings, the broccoli & potatoes, the sour cream, and velveeta cheese. Stir occasionally and let the velveeta cheese melt for about 10 minutes.
  5. Add the cheddar cheese and stir it again until melted. Turn off heat.
  6. OPTIONAL: If you added potatoes, I highly recommend this and this will help create a thicker soup. Use a potato masher in the soup the break up the potatoes and other vegetables. I would still advise this even if you didn't add potatoes as well.
  7. Serve with your favorite toppings and add any additional salt and pepper to taste.

Monday, July 13, 2020

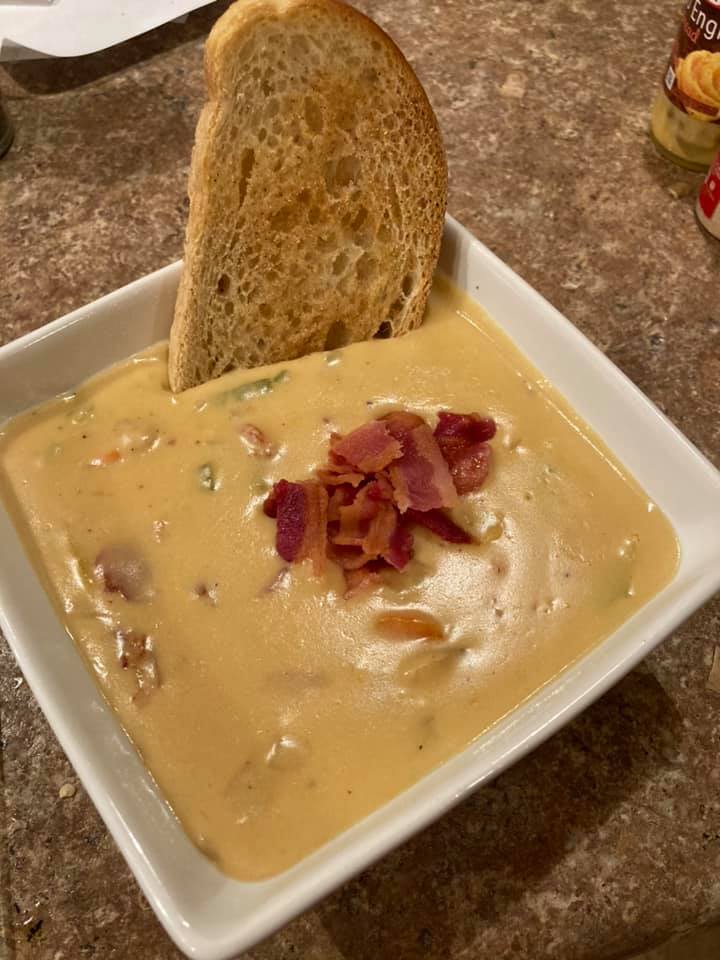
Bacon Beer Cheese Soup!

Looking for a thick and tasty soup good for anytime of the year? Bacon Beer Cheese Soup has your back. It's the best soup you'll ever eat.
------------------------------------------------------------------------------------------------------------------------
Prep Time: 30 minutes
Cook Time: 25 minutes
Serves: 6

Items Needed:
  • Large pot
  • Measuring utensils
Ingredients:
  • 16oz bacon (12+ strips), cooked & diced (more bacon if you want toppings!)
  • 32 fl oz chicken broth
  • 16 fl oz half & half
  • 1 large yellow onion, diced
  • 1 large red pepper, diced (any bell pepper would do fine as well)
  • 1 small jalapeno, diced
  • 4 stalks celery, diced
  • 4 large carrots, peeled & diced
  • 4 tbsp butter
  • 1 tbsp olive oil
  • 1 tbsp minced garlic
  • 1 tsp Worcestershire sauce
  • 1 tsp Dijon mustard
  • 1/2 cup all purpose flour
  • 12 fl oz beer (lager or ale preferred)
  • 16 oz Velveeta cheese loaf, cut into chunks
  • 5oz Kraft cheese spread (old English sharp cheddar or pimento are good)
  • 4oz pepper jack cheese, shredded
  • 2oz cheddar cheese, shredded
  • 1 tsp salt
  • 1 tbsp pepper
Directions:
  1. In a large pot, add your olive oil, garlic, and all of your vegetables. Cook until they are soft. About 6 minutes on medium high.
  2. Lower your heat to medium low and add the butter. Once it melts, add your flour. Stir until it becomes thick, slightly brownish and all the flour lumps have been dissolved and cooked.
  3. Add some of your half & half  until it is "absorbed" by your roux. Keep doing this until you used all your half & half.
  4. Add your beer & chicken broth. Cook on medium high heat for 10 minutes to let some of the beer cook out.
  5. On medium low heat, add in your Worcestershire sauce & Dijon mustard. Add your salt & pepper. Add in your velveeta cheese and let it melt. Stir it a lot to help the cheese melt.
  6. After the Velveeta has melted, add in your your cheese spread (whatever kind you use). Let it slowly melt and stir like the Velveeta.
  7. Once the cheese spread has melted, add in your pepper jack cheese and let it melt as well and stir.
  8. Do this process once more for the cheddar cheese.
  9. Stir in your bacon & voila! Turn off the heat. Add more salt & pepper to taste.
Note: You can add a LITTLE more flour if you like it really thick, like we do! You can also add more beer. We add a few 'sips' from a second can for flavor. I will say it's hard to add "too much" beer, but I wouldn't quite add two 12 fl oz cans, one is good! You can also add broccoli or green onions if you'd like to. They would go well in this! We made simple garlic bread to dip into the soup. You don't have to use Velveeta or Kraft brands. Off brands that are cheaper are great too! Another great option instead of the 2oz cheddar cheese is a smoked gouda or smoked cheddar cheese.

Also, this is the ale we used and did not regret it. It has a smokey taste that pairs well with the bacon, peppers, and pepper jack cheese.
https://saugatuckbrewing.com/beer/bonefire-brown/

Sunday, May 17, 2020

Baked Philly Cheesesteak Egg Rolls!

If you love Philly cheesesteaks and you love egg rolls, you just might love this recipe!
 
------------------------------------------------------------------------------------------------------------------------
Prep Time: 30 minutes
Cook Time: 25 minutes
Serves: 3

Items Needed:
  • Large pan
  • Baking sheet
Ingredients:
  • egg roll wrappers
  • 1lb ground beef
  • 1 medium yellow onion, diced
  • 1 large green pepper, diced
  • 10 slices of provolone cheese
  • 1 teaspoon Worcestershire sauce
  • 1/2 teaspoon pepper
  • 1/2 teaspoon salt
  • small bowl of water
  • cooking spray
  • special sauce (we used Kraft, any sauce you want is fine!)
Directions:
  1. Preheat oven to 425 degrees F. 
  2. Cook the ground beef in a large pan over medium-high heat. Add in the Worcestershire sauce, pepper, and salt.
  3. When the meat is nearly browned, add in the peppers & onions.
  4. Once the meat has been fully cooked and the vegetables have been softened, DRAIN the pain of any liquid/grease. Otherwise, you will have soggy egg rolls. Put two slices of provolone cheese on top and finish cooking until the cheese is mixed in and completely melted. Turn off the heat and set aside.
  5. The egg roll packages usually show how to fold them. First, put half a slice of provolone down, then you want put about 3 tablespoons (don't over stuff your egg rolls) in the middle, but slightly towards one corner. Fold in that corner first toward the middle. Then fold in the two side corners to the middle and roll the egg roll carefully to the last corner. Use the small bowl of water to put a few drops on the last corner to help keep it together and put the egg roll on the baking sheet with the seam side down. Repeat this step until you are out of filling or egg roll wrappers.
  6. Spray the tops of your egg rolls with cooking spray. Don't use too much or it will get greasy.
  7. Bake for about 25 minutes until they are golden colored.
  8. Dip into the special sauce and enjoy!
Note: You can fry them instead if you want to! The process is the same except don't use cooking spray and you want to use a deep dryer or a pan with about an inch of canola oil on medium-high heat. You cook each side of the egg roll for maybe 3-4 minutes.

Saturday, April 18, 2020

Skyrim Vegetable Soup! With Extras!

This is a twist on Potato & Leek Vegetable soup! Skyrim inspired!
Okay Dragonborn, get out your boar meat, butter, carrots, goat cheese, leeks, potatoes, dried elves ear, potatoes, salt, garlic, bread, & a jug of milk!
Just kidding! I promise this recipe is tasty & easy though!


------------------------------------------------------------------------------------------------------------------------
Prep Time: 30 minutes
Cook Time: 30 minutes
Serves: 4+

Items Needed:
  • Large pot
  • Measuring Tools
  • Potato masher or blender (optional, but recommended)
Ingredients:
  • 4 tablespoons butter
  • 3 carrots, peeled & diced
  • 1 small yellow onion, diced
  • 3 leeks, chopped (look below for ease of washing/cutting)
  • 2lbs gold Yukon potatoes, chopped (peeled is optional)
  • 1 cup heavy whipping cream
  • 5 cloves of garlic, minced
  • 4 cups chicken broth (low sodium is what we use)
  • Seasonings: 
    • 2 teaspoons dried dill
    • 1/2 teaspoons black pepper
    • 1/2 teaspoons salt
    • 1 teaspooons mustard powder
    • 2 teaspoons fennel seeds
    • 3 sprigs of fresh thyme
    • 3 bay leaves 
  • Optional ingredients:  
    • 8oz shredded cheddar cheese
    • 8oz (12 strips) bacon (4 strips for topping)
    • 3 ribs celery 
    • Scallions for topping
    • Bread: ciabatta, Italian, garlic, etc. for dipping
Directions:
  1. In the large pot on medium-high heat, melt the butter and add the garlic, onions, leeks, celery, & seasonings until softened and fragment. About 5 minutes.
  2. Add the carrots, potatoes, chicken broth, bay leaves, & thyme. Stir well. Let it look for 20 minutes on medium-high heat. 
  3. If you are adding bacon, cook it using your preferred method such as a pan, oven, microwave, etc. Dice 8 strips of bacon once cooked & cooled. Dice the other 4 strips, but keep separate to use as a topping.
  4. Turn the heat to medium-low and remove the bay leaves & thyme. Add 1 cup of heavy cream. If you want bacon and/or cheese (recommended), add in 8 strips of bacon. Slowly mix in handfuls of the cheddar cheese at a time to the soup. Add more pepper & salt to taste, if desired.
  5. For a thicker soup, use a potato masher to mashed up the chunks. For a thinner soup, you can use a hand blender. You can also put the soup into a regular blender, leaving a hole at the top for heat to escape.
  6. Ladle into bowls and garnish with bacon pieces, scallions, & cracker pepper. Serve with bread.
Note: If you aren't used to cooking with leeks, they can be tricky for some to get them clean as dirt has a tendency to hide between the folds. 
Cut off the green tops and the white tip root & discard. Cut the leek in half lengthwise and wash each half under water to get the dirt out. You can also use a colander. After each leek has been washed, they can be chopped.


Sunday, February 9, 2020

Slow Cooker Cheesy Buffalo Chicken Ranch Dip

This is such a great meal to serve at parties, potlucks, or simply for dinner! If you don't have a slow cooker, you can do this in a pot, but I love the ease of the recipe and that it takes a shorter time to cook compared to others!


------------------------------------------------------------------------------------------------------------------------
Prep Time: 10 minutes
Cook Time: 2.5 hours
Serves: 4+

Items Needed:
  • Slow cooker
  • Measuring Tools
Ingredients:
  • 1lb chicken breasts (thin sliced - cooks faster)
  • 3 8oz packages of cream cheese, softened
  • 1/2 cup of shredded cheddar cheese
  • 1/2 cup of shredded colby jack cheese
  • 1/2 cup of buffalo sauce (we use Sweet Baby Ray's, but RedHot is good too)
  • 3 green onions, diced, separate whites & greens
  • 2 ribs celery, diced (smaller the better)
  • 1 1oz or 2 tablespoons ranch seasoning packet
  • 3/4 cup of ranch dressing OR bleu cheese dressing
  • 8oz or 1 cup of sour cream
  • Tortilla chips, crackers, or veggies for serving with!
Directions:
  1. In the crock pot add your chicken and seasoning with HALF of the ranch seasoning packet (or 1 tablespoon). Add in just the onion whites. Cook on high for 2 hours.
  2. After 2 hours of cooking, the chicken should be done. Remove the chicken and shred it with a knife and fork. Then add it back to the pot.
  3. Add the following into the pot: cream cheese, shredded cheeses, buffalo sauce, the other half of the ranch seasoning, sour cream, and the ranch or bleu cheese dressing. Stir well! Cook for 30 minutes.
  4. After 30 minutes, add in the celery & green onions. Stir again.
  5. Turn off slow cooker or set to warm and serve!
Note: Pepper jack cheese is a great substitute if you like spicy or peppers! You can add more cheese & buffalo sauce to taste as well! Do NOT add salt to this recipe. Ranch seasoning has a lot of salt already in it and it tastes very salty with any added salt!

Friday, October 25, 2019

Perfect Slow Cooker Chili! (Spicy Subsitutions!)

Chili season is upon us! This is my versatile and go-to chili that is easy and a slow cooker meal so it's ready at the end of the day. I even included options to make it very HOT and spicy, if you like it! I can actually suggest a lot of substitutes for this recipe as well because it can have a lot of different flavors, but all tasty. The base recipe is still the same, but you can easily swap out the ingredients! I am not a fan of watery chili and I like it with a little bit heat so this recipe encompasses both!


------------------------------------------------------------------------------------------------------------------------
Prep Time: 20 minutes
Cook Time: 4-8 hours
Serves: 4

Items Needed:
  • Slow cooker
  • Large pan
  • Measuring Tools
Ingredients:
  • 2lbs ground turkey (drained of any grease) 
    • Use the following seasonings for the ground turkey only:
    • 2 teaspoons chili powder
    • 1 teaspoon red cayenne pepper
    • 1 teaspoon black pepper
    • 1 teaspoon salt
  • 2 14.5oz cans of dark red kidney beans (drained & rinsed)
  • 1 14.5oz can of diced tomatoes with chilis (Rotel brand or not)
  • 2 14.5oz cans of tomato sauce (use 1, if you like it really thick)
  • 1 green pepper, diced
  • 2 small shallots, diced
  • 1/2 large red sweet onion, diced
  • 1 mild banana pepper, diced (you can leave the seeds or not)
  • 1 teaspoon salt
  • 1 teaspoon black pepper
  • 2 tablespoons chili powder
  • 1 teaspoon red cayenne pepper
  • 2 tablespoons of fresh cilantro (leaves & steams), minced
  • 1 tablespoon of extra virgin olive oil 
  • 2 tablespoons of fresh garlic, minced or grated
  • Toppings include your choice of...
    • Shredded cheddar cheese
    • Sour cream
    • Cilantro
    • Original or Chili Cheese Fritos
    • Pepper & salt
    • Saltines or oyster crackers
Substitutions:
  • Turkey: Ground beef, ground venison, ground chicken, or ground pork are all acceptable.
  • Diced Tomatoes with Chilis: Italian diced tomatoes, plain diced tomatoes, diced tomatoes with onion & garlic, diced tomatoes with onion, green pepper, & celery.
  • Red Onion & Shallots: One large red onion, 2 medium yellow onions, or any other combination of onions.
  • Banana Pepper: A jalapeno pepper is really good choice. Mild Anaheim, chili pepper, hot Hungarian wax. I use a jalapeno a lot instead of banana if I really want it spicy, two if I am trying to go for spicy.

Directions:
  1. In a large skillet or pan, heat your extra virgin olive oil. Once it is heated, add your ground turkey and the seasonings listed for just the turkey. Cook until there is no pink meat showing. Break up the meat as it cooks into small pieces.
  2. You can cut all the vegetables needed while the turkey is cooking. 
  3. Once the meat is cooked and your vegetables are cut, add everything to your slow cooker. Add the other seasonings as well. Add the beans, tomatoes, and tomato sauce. Everything should be added to the slow cooker.
  4. Stir the pot well.
  5. Cook on high for 4 hours or low for 8 hours. Stir half way, if possible.
  6. When done, spoon out to a bowl & add any amount of toppings you prefer. I like cheddar cheese, sour cream, cilantro, Fritos, & more pepper & salt.
Note: If you love a spicy chili, please use a jalapeno or two instead of a banana pepper. You can also increase the red cayenne and even add a tablespoon of sriracha!

Friday, October 18, 2019

Hello Fresh Review!

HelloFresh is a meal delivery service kit that has the potential to ship 2-4 recipes for 2-4 people each week. Each meal kit is packaged with the meats needed for the recipes between ice, with produce and everything else stored in a bag on top to ensure freshness in order to cook your meals. Each meal comes with all the ingredients needed for it inside a labeled bag with recipe cards with pictures and easy to follow steps. You will need to keep oil, sugar, butter, pepper, and salt on hand. Recipes vary each week, so you won't have to be stuck eating the same thing over and over again. Some recipes have additional charges as well, but only 3 out of the large selection.

I am not a representative, nor am I a weekly HelloFresh subscriber as I write this review. I simply wanted to try it via co-workers' recommendations. I can't say that I do or do not recommend HelloFresh because it's definitely a personal choice depending on your lifestyle & budget. I can give $40 off your first box if sign up if you'd like to try it though. I can also send a limited quantity of free boxes, so please message me your email if you're interested.

The Recipes:

Chicken & Pineapple Quesadillas
Chicken, pineapple, onions, peppers, taco seasoning, homemade pico de gallo, & sour cream in a broiled tortilla shell.

 
 Pepperjack Burgers & BBQ Wedges
Stuffed BBQ seasoned burgers with pepperjack cheese with onions, peppers, sweet potato wedges with BBQ seasoning, & spicy ketchup

Tuscan Sausage & Pepper Spaghetti
Spaghetti in tomato sauce with spicy Tuscan seasoned sausage, peppers, & onions with Parmesan cheese.


These were the 3 meals we ordered for 2 people. My husband is quite the picky eater and he ate all of the meals happily. We liked each one, however, both of us really enjoyed the Chicken & Pineapple Quesadillas. Most likely because it is something we enjoy, but something I never cook. Each recipe was easy enough to make, but I thought that the Pepperjack Burgers & BBQ Wedges was the most difficult to cook, but sweet potatoes aren't always easy to cut and the recipe required a burger stuffed with cheese, which we never cook either. 

Pros:
  • Each meal had fresh ingredients that were also of great quality
  • The recipes were very easy to follow and everything was packaged together for ease
  • The meals were tasty and we would eat each one again
  • Calories & nutrition are listed for each recipe on the website. The recipes are also listed there in case something happens to your recipe card
  • You make everything, so it's fresh with very little preservatives or additives. 
  • Everything is perfectly proportioned. It teaches portion control and helps those who have trouble with it
  • Each week is a different menu with nearly 20 recipes, only 3 of which are up-charged for having more expensive ingredients
  • Every ingredient is used in the recipe completely, which has no waste of food
Cons:
  • The cost is very expensive. For 3 meals for 2 people a week, it is $60. If it was routinely $30, we would do HelloFresh more often. 
  • The packaging is a little much & a lot of plastic included, so not very eco-friendly
  • The prep & cook time total on each card took me 10 minutes longer to do for each meal & this is staying focused cooking on the meal and not getting distracted doing other things
  • It's much cheaper to grab the ingredients at the grocery store yourself and cook the recipes

I would recommend this service for beginner cooks. If you can try it for a good price, it's good to experience and open up some recipes to your library. I also like that you can try new foods each week because we get tired of making soups, pasta, & tacos each week. However, the price is really the largest issue for me. If it was half of regular price, I would use it pretty regularly.

However, I can tell you what we decided is the best for our lifestyle. Because the price is such a large con that it trumps everything else, we were able to order so many meals at discounted prices. We are getting 18 meals for 50%+ off. We will not pay full price, so we won't be buying anymore HelloFresh boxes after that amount ends unless it's discounted. We really enjoyed the recipes and my husband is so picky that I am tired of our weekly battle of, "what do you want for dinner?" so I can grocery shop & make it. We will be looking at HelloFresh's weekly menus often and choose meals we want to try each week, but we will grocery shop for it ourselves and use the recipes provided on the website to measure out our ingredients and make the recipe. This is cheap, but still using HelloFresh's amazing recipes to our advantages and it works for us. You can even download and print the PDFs online if you'd like a recipe card in front of you while you cook! We are going to make our own HelloFresh recipe book.

Sunday, August 18, 2019

Southern Chicken & Rolled Dumplings

This is a hearty filling meal made with the type of dumplings that are rolled and it's a one pot meal as a perk. These dumplings tend to have more of a "doughy" consistency, unlike the fluffy biscuit-like dumplings, which are drop dumplings.


------------------------------------------------------------------------------------------------------------------------
Prep Time: 30 minutes
Cook Time: 20 minutes
Serves: 4+

Items Needed:
  • Large pot
  • Wax paper or large clean surface
  • Measuring Tools
  • Rolling pin 
  • Mixer stand (optional)

Ingredients:
  • 2 48oz cans of chicken broth
  • 1 package of uncooked boneless chicken breasts
  • 2 cups all-purpose flour
  • 1 cup all-purpose flour (set aside)
  • 1 tablespoon all-purpose flour (set aside)
  • 1 cup cold buttermilk or milk (whole preferred, but we used 1% this time & it was great)
  • 1/2 teaspoon baking powder
  • 2 tablespoons cold salted butter (cut into small chunks)
  • Two pinches of the following seasonings... salt, pepper (cracked pepper preferred)

Directions:
  1. In the large pot, add your chicken broth and chicken. All add in your 1 tablespoon of flour and give it a good stir.
  2. Let the chicken boil for 10 minutes or until cooked through.
  3. Take the chicken out and shred it using a knife and fork or using a mixer stand.
  4. Add the chicken back into the pot with the seasonings. Get it to a boil for your dumplings.
  5. To make the dumplings, add the flour & baking powder into a bowl and mix it with your hand or a spoon.
  6. Add in the butter and make sure the butter is mashed into the mixture as much as possible using a fork, or even better mush it up using your fingers. There shouldn't be any large chunks of butter in the mixture when you are done.
  7. Slowly add the cup of buttermilk or milk while forming the dough. If the dough is too sticky, add a little flour at a time until you get the right consistency. It shouldn't be sticking to your fingers is how you know.
  8. On wax paper or a clean surface, put down a layer of flour from the 1 cup set aside. Put some on the rolling pin as well. Put the dough on the wax paper and sprinkle more flour on top.
  9. Roll the dough out to be about 1/4" of thickness. Cut them into squares or rectangles that are about 1-2" large. Please note, they do expand when cooked. If you don't have a rolling pin and cutting is taking too much time, you can pull off little balls of dough and flatten them somewhat using your fingers.
  10. Drop the dough pieces into the boiling pot with the chicken. Cook for 5 minutes. Do NOT exceed 10 minutes or the dough will start to turn tough.
Note: The extra flour from the dumplings will make the meal thicker. This tastes just as good the next day warmed up and gets thicker overnight due to the flour as well.

You can also add vegetables to your broth or cream if you want a little more to it than just chicken and dumplings, but we love this simple hearty meal!